Just in case you are lost here, here is a quick introduction to Jellyfin. It’s a free, open-source media server that allows you to stream your personal media library to any device with a Jellyfin app available. Just like Plex or Kodi, it helps to easily organize and access your movies, TV shows, music, and photos from anywhere.
In this article, we will guide you through the process of setting up both the Jellyfin server and client, helping you to create a seamless media streaming experience.
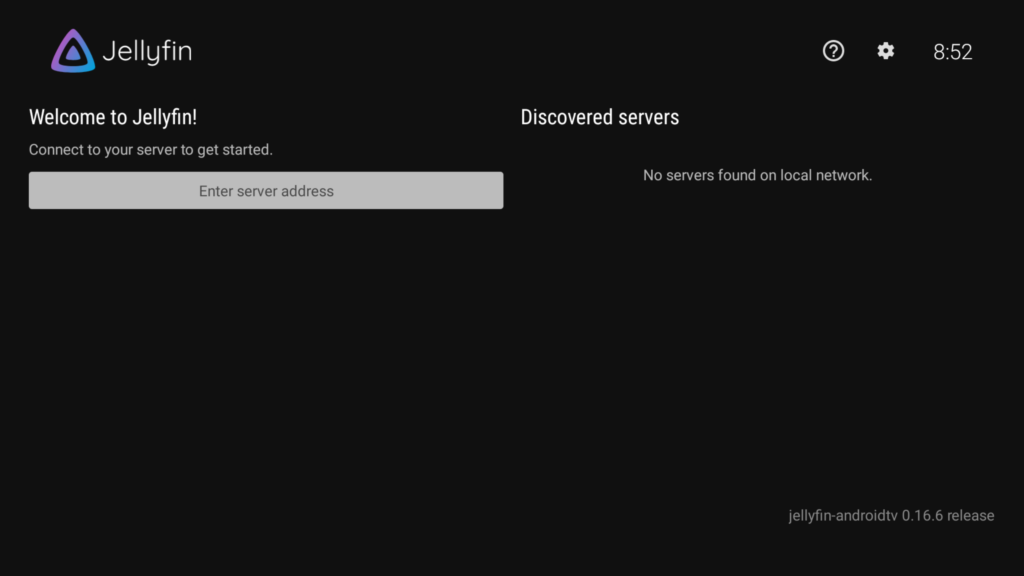
If you’re not familiar with the server / client concept, you might have tried to install the client (ie. the app). The first screen will prompt you to enter the Jellyfin server address (screenshot below). That’s the server address. Jellyfin, just like Plex, requires a server to communicate with your client. Don’t worry, it’s (almost) as easy to install both. Let me show you.
Jellyfin Server: Install and Setup
Setting up Jellyfin involves installing the software, configuring it, and adding your media library. Here is a step-by-step guide to setting up Jellyfin on Windows; Jellyfin server is also available for MacOS, Linux, and docker.
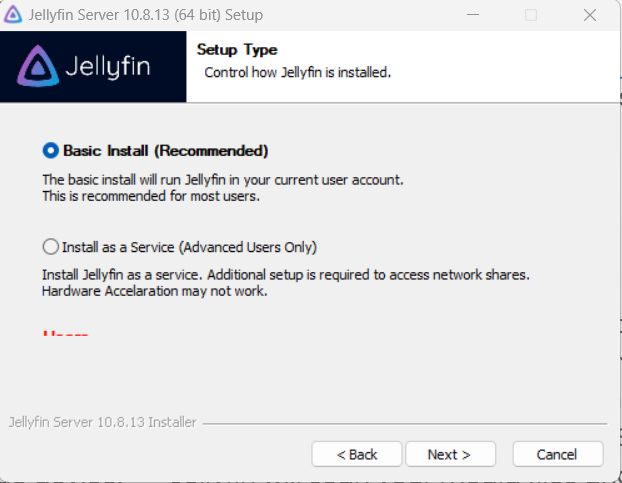
1. Download and Install Jellyfin Server: https://jellyfin.org/downloads/server
Follow the on-screen instructions to install Jellyfin on your computer.
2. Configure Jellyfin Server:
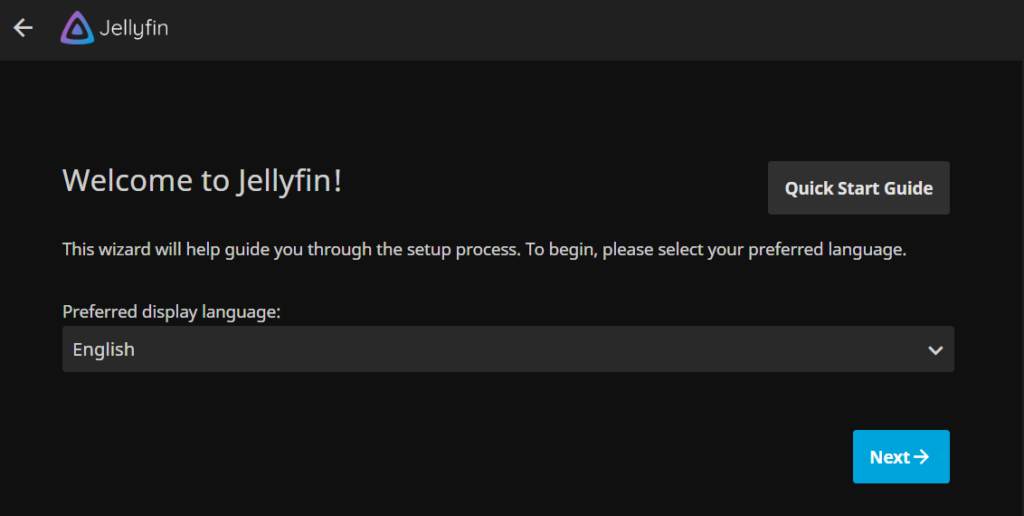
– Open your web browser and enter “http://localhost:8096” in the address bar to access the Jellyfin web interface.
– Follow the on-screen instructions to set up your Jellyfin server, including creating an admin account and choosing your server settings.

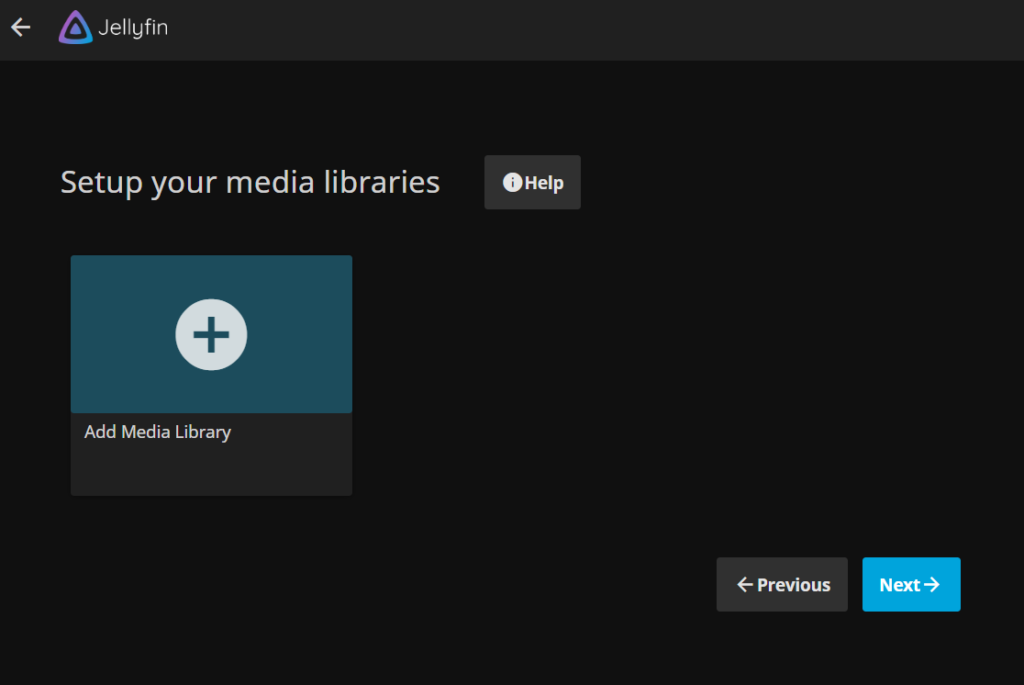
3. Time to set up your media libraries:
– Click the “Add Media Library” button on the Jellyfin dashboard
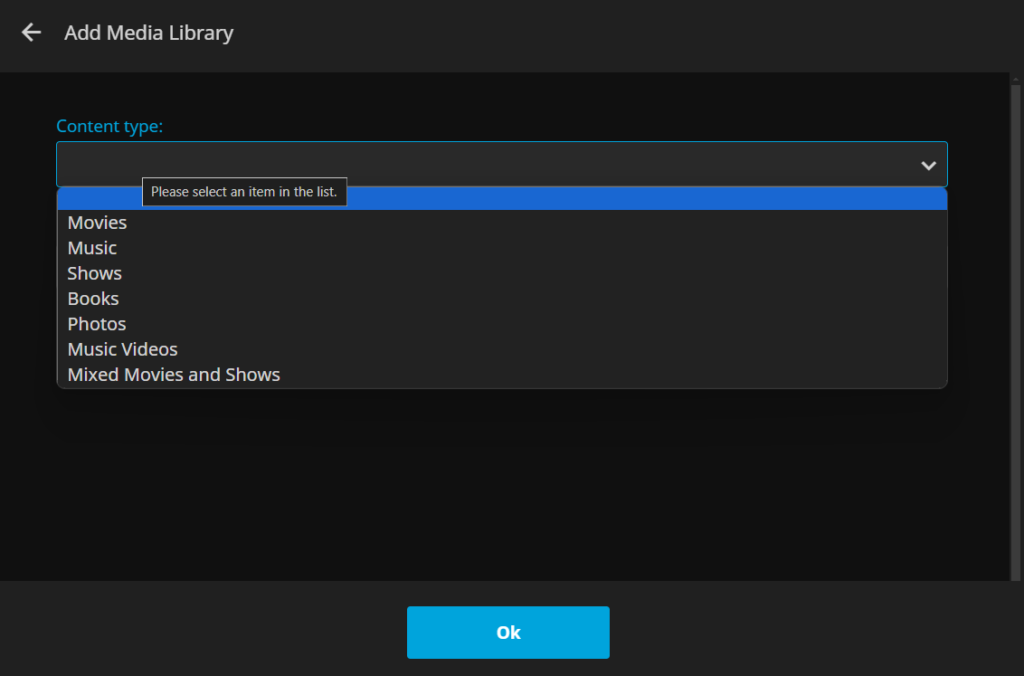
– Choose the type of media you want to add (e.g., Movies, TV Shows, Music, Photos)
– Select the location of your media files on your computer or network.
Jellyfin will scan your media files, identify them and add them to your library
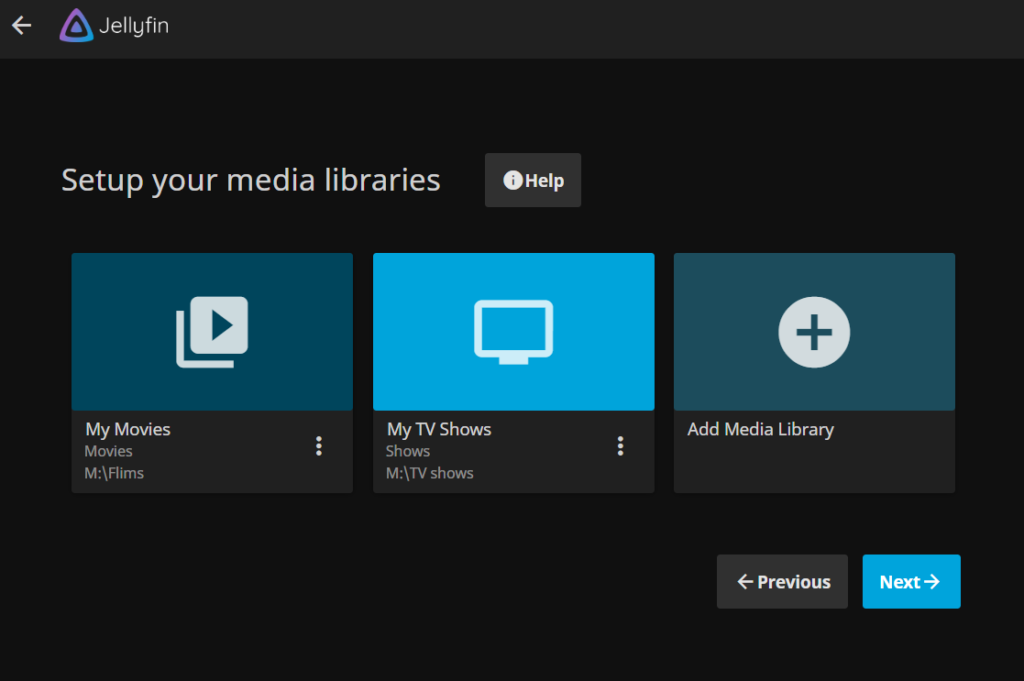
Here’s an example with 2 media folders created, one for movies, one for tv shows.
If you plan to access your Jellyfin server from outside of your local network, don’t uncheck the option to “Allow remote connections to this server”

You can now log in to a client, or use the same local address (http://localhost:8096), and the server should already have started to populate the libraries.
If installed on your computer, keep in mind that if you shut it down, the server won’t respond anymore and you won’t be able to use the client. To fix that, you need to set up a machine that stays connected, ideally a mini-PC/NUC or a Raspberry Pi, because of their low power consumption.
Frequently Asked Questions
Is it possible to install Jellyfin on NVIDIA Shield?
No. Jellyfin server is unavailable for Android and has no plans ever to be. It is only available for Windows, Linux, MacOS, and docker.
Plex or Jellyfin, which one is the best?
Plex is more user-friendly and has a larger user base, offering a variety of features like automatic organization of media files and easy access to streaming content. On the other hand, Jellyfin is open-source and provides more customization options, as well as the ability to host your own server without any subscription fees.
The best platform between Plex and Jellyfin ultimately depends on individual preferences and requirements:
If you prefer a more streamlined and polished experience, Plex may be the better option for you. However, if you value privacy, control, and customization, Jellyfin may be the preferable choice. Ultimately, it’s recommended to try out both platforms and see which one better suits your needs.